Thanks,
Mary Burroughs
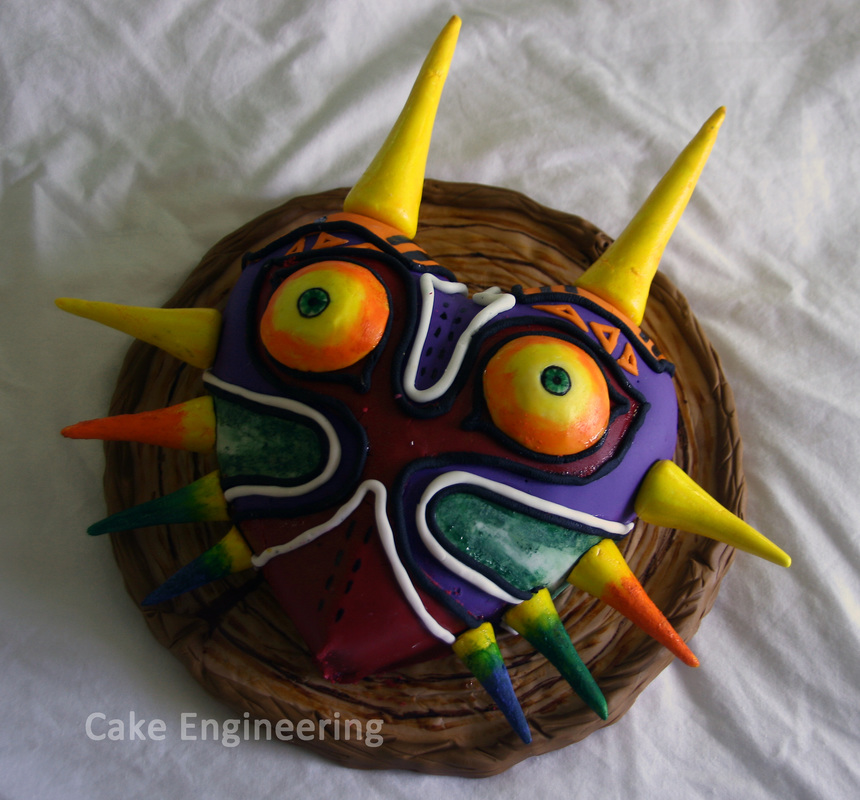
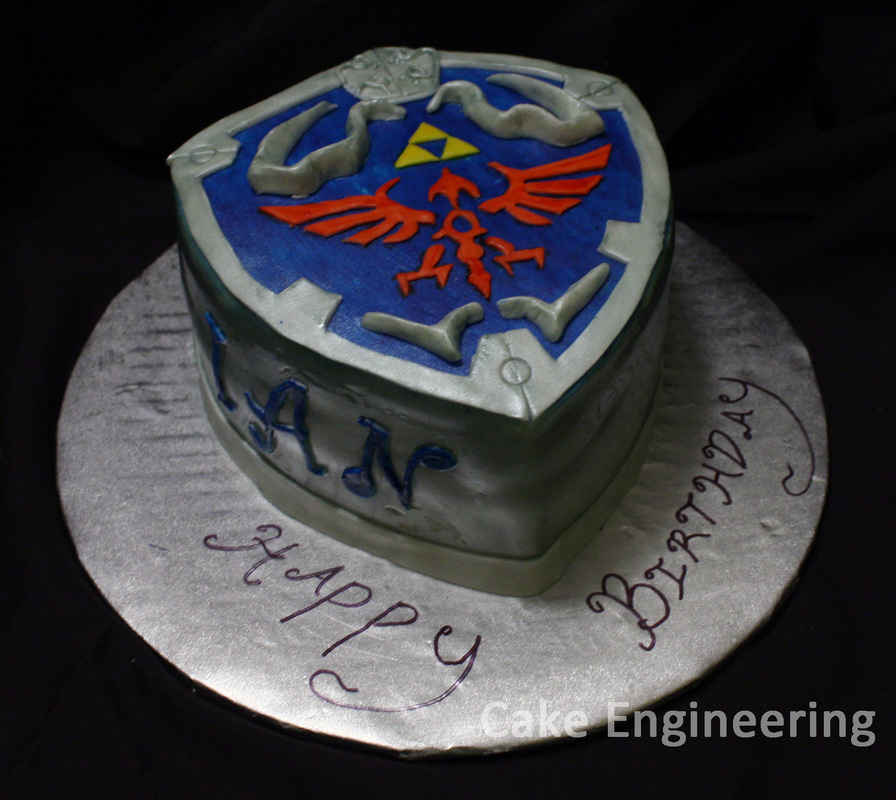
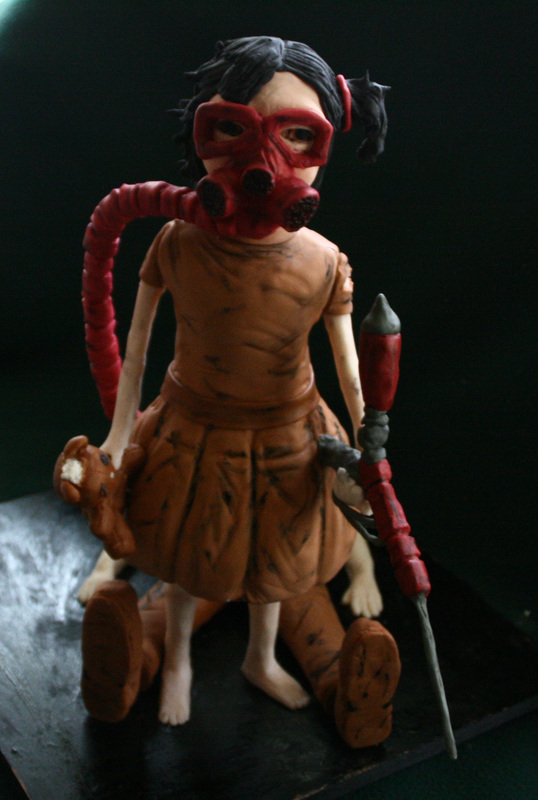
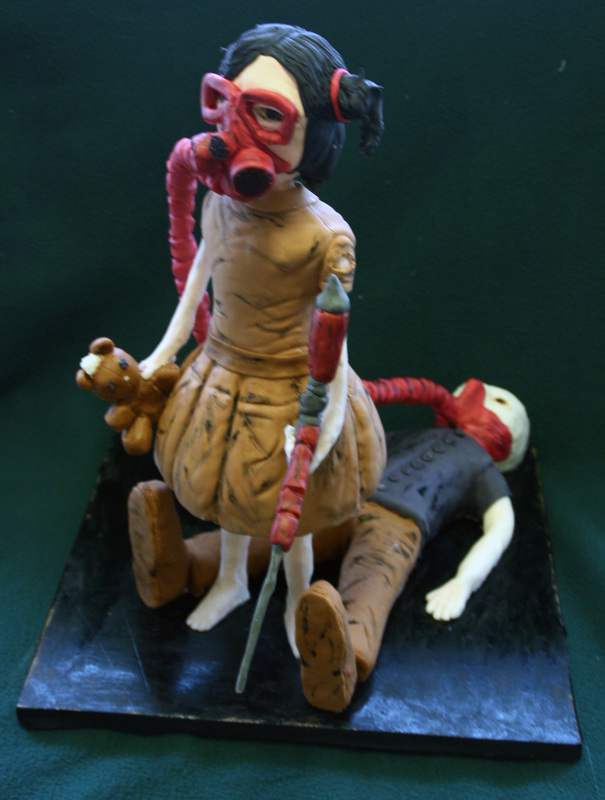
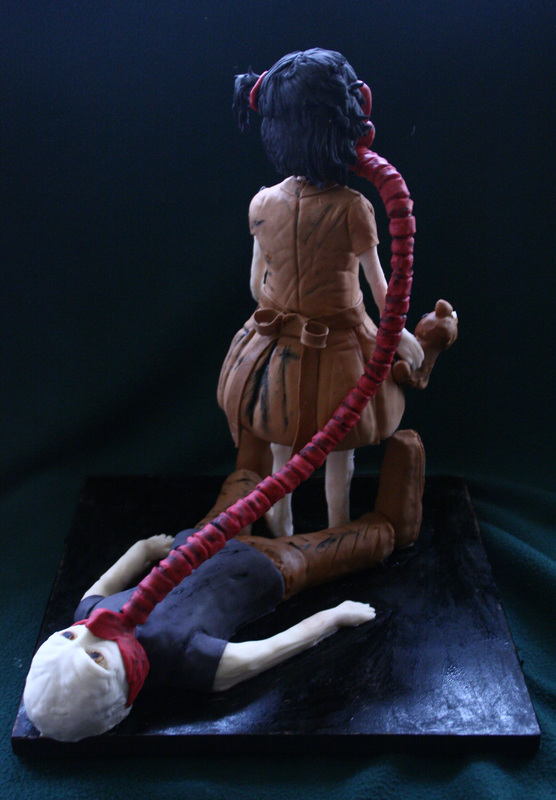
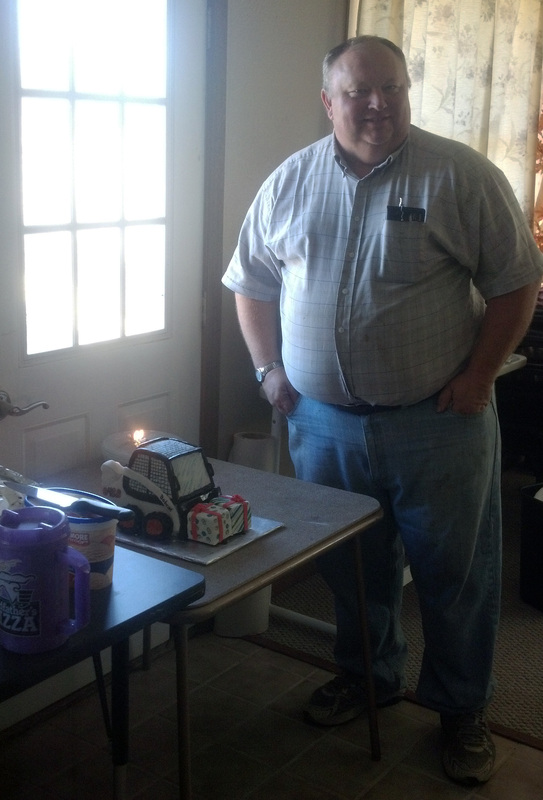
So as I said in my last blog post, I'm a little behind on updating my blog. This post will focus on the cakes made in 2015. First up is my boyfriend's (now fiance) birthday cake. He is a huge fan of the Legend of Zelda video games, so I always try to make a Legend of Zelda themed birthday cake. This year I decided to make a Majora's Mask cake. Now it so happened his birthday fell when I was in Virginia on a temporary assignment. I also didn't have a full sized oven to bake the cake. Being the engineer that I am, I decided to try my hand at baking a cake in a toaster oven I brought with me. What I learned when baking a cake in a toaster oven is that you can only fill the cake pan 1/2 way, not the usual 3/4 full. If you fill it 3/4 full, the top will burn before the inside of the cake is finished. But I was able to scrape off the burnt part of the cake and still make a decent cake. Not too shabby for decorating a cake in a hotel room with only a toaster oven. 
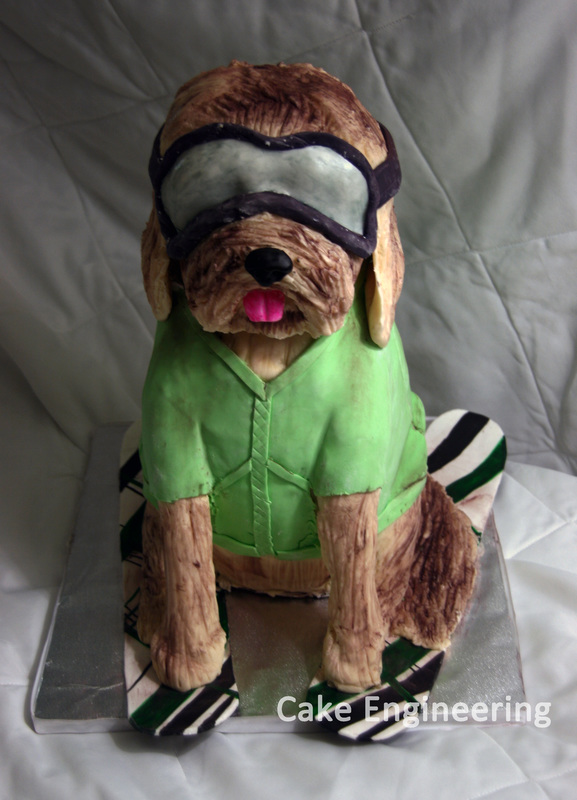
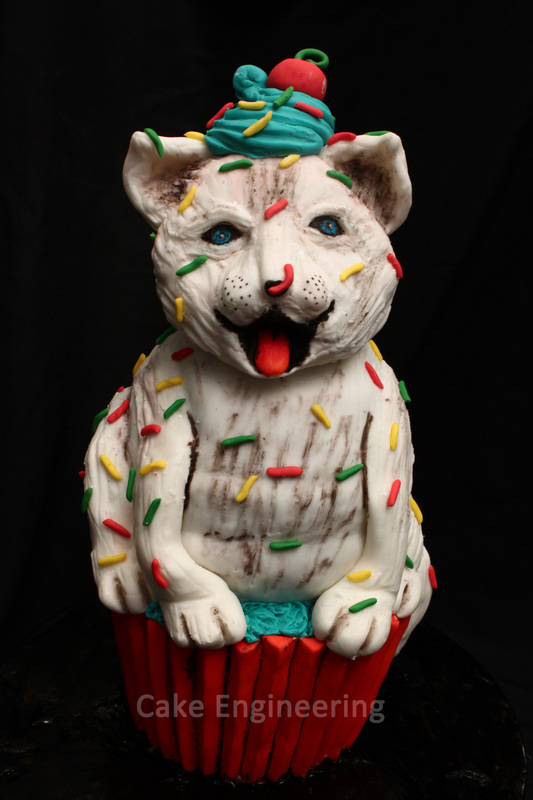
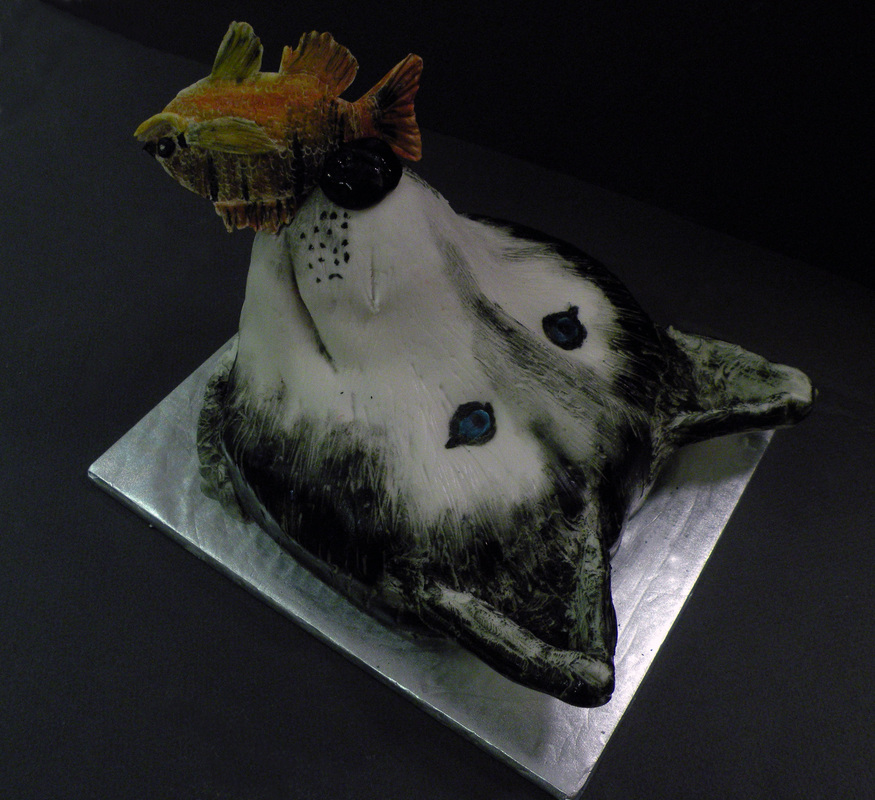
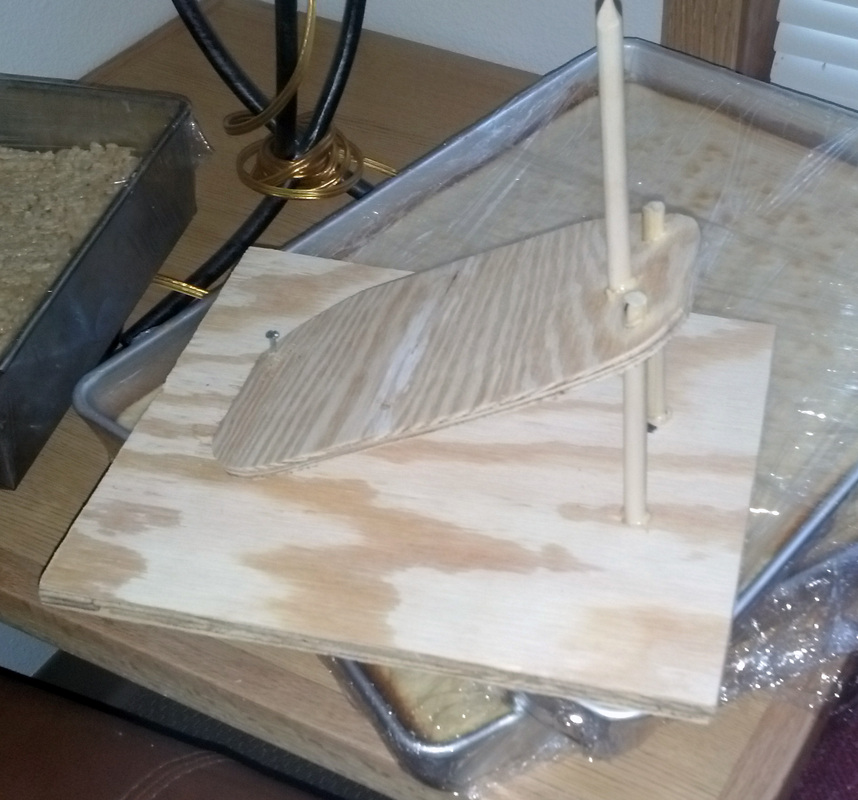
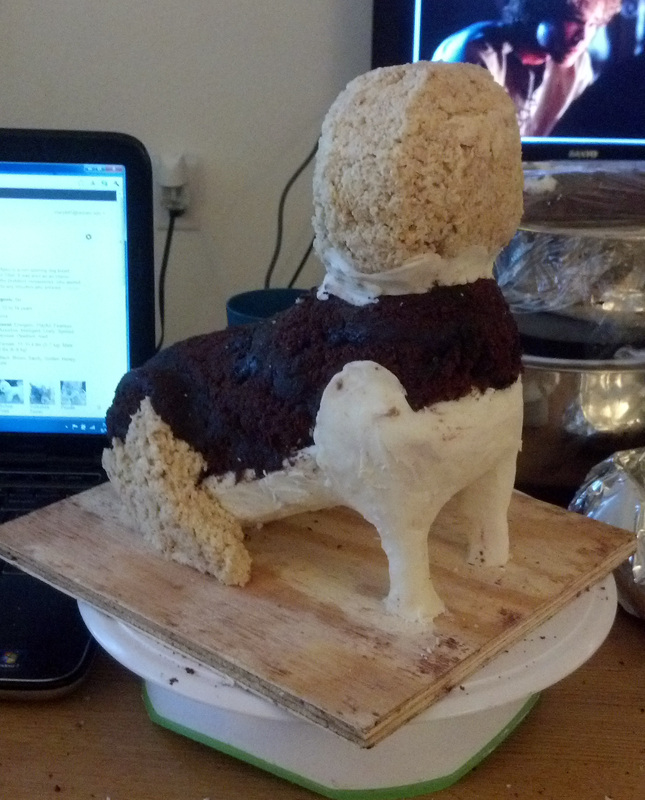
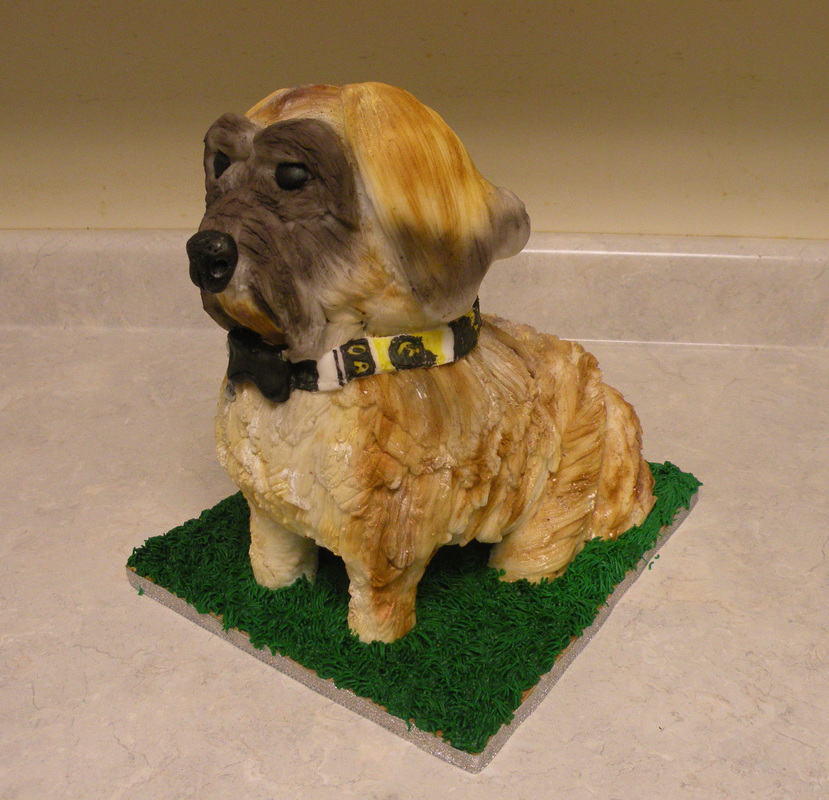
While I was still in Virginia my program director was leaving for a new office. I promised her I would make a going away cake for her. Well being the pro I was at making cakes in a toaster oven, I felt pretty comfortable making this cake. It did take me triple the amount of time to bake the cakes then it would have in a regular oven, but I had nothing better to do in my down time. This cake is a hybrid of my program director's two loves: her dog and her love of skiing. So I combined the two. I don't know how many hours this cake took, but it was a lot. It was definitely fun to make and I loved seeing the look on her face when she saw the cake. 
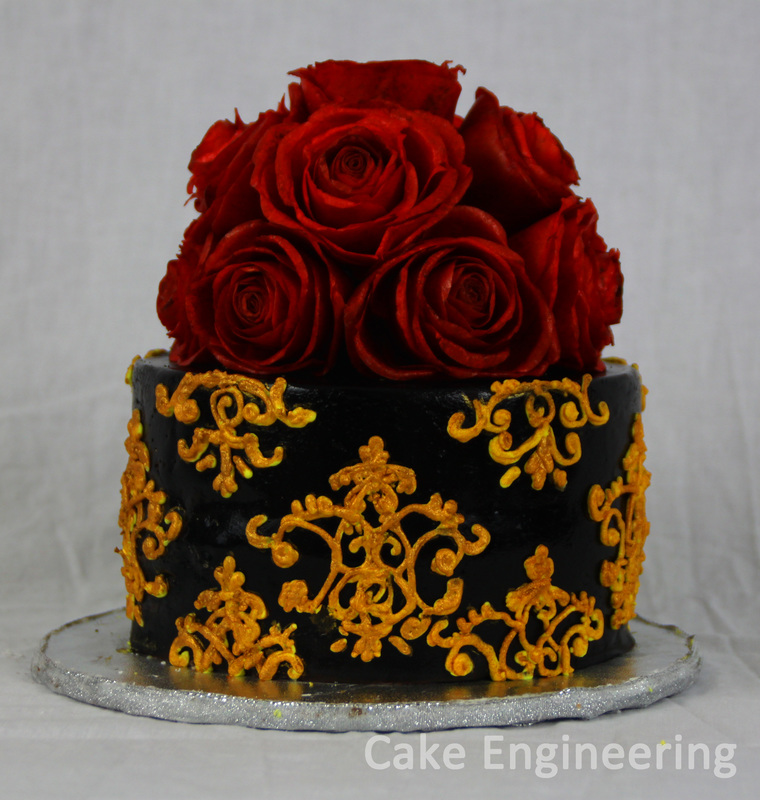
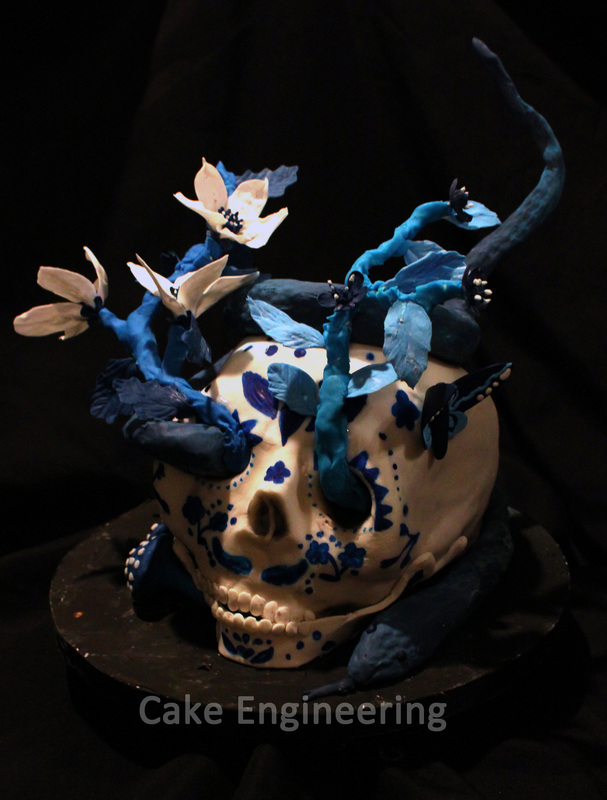
Next up is a Gothic inspired cake with wafer paper roses. This was my first attempt at making wafer paper roses, so I had a large learning curve. The thing that took the most time was coloring each rose petal. If I didn't have to color the paper, it would have taken me a lot less time. I really like the look of these roses and look forward to doing them again on another cake. The pattern on the cake was hand-piped on and then overlaid with gold luster dust. 
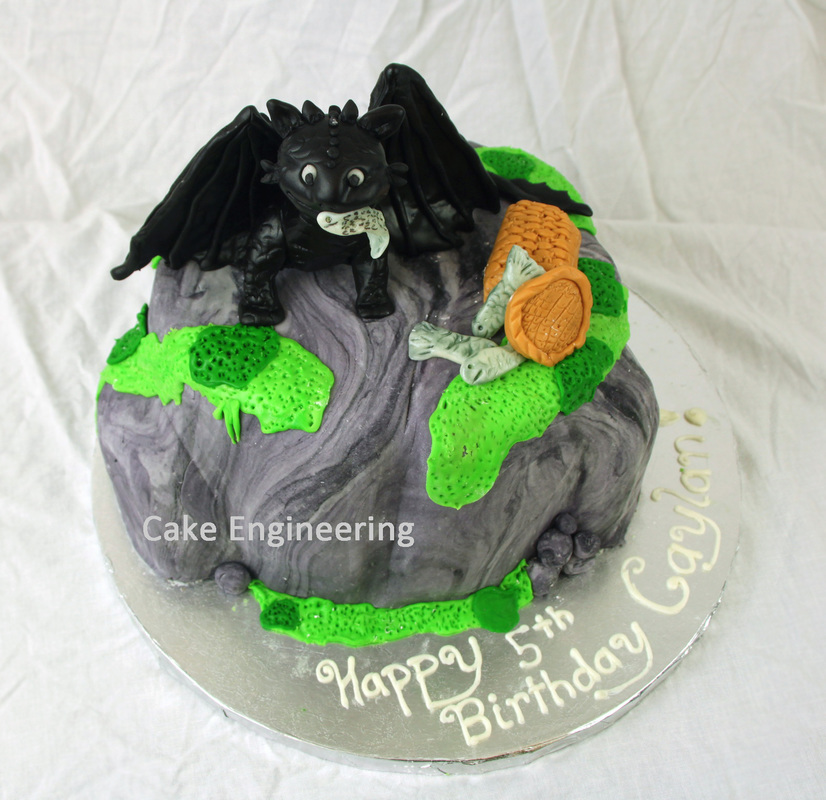
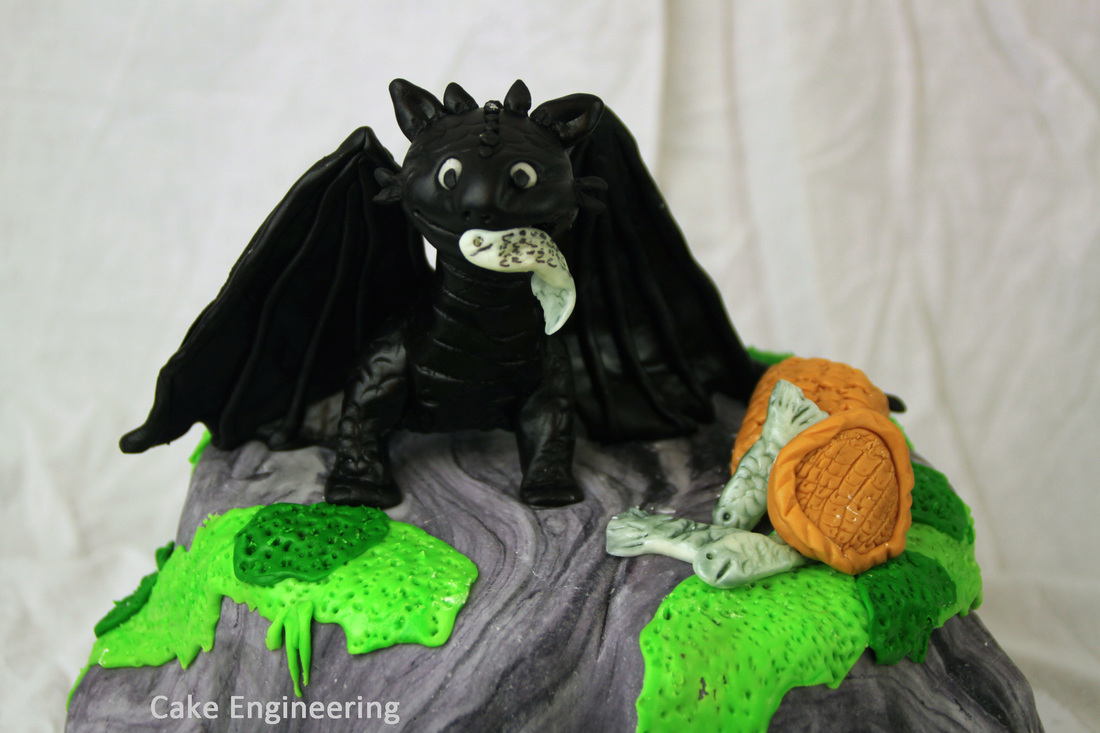
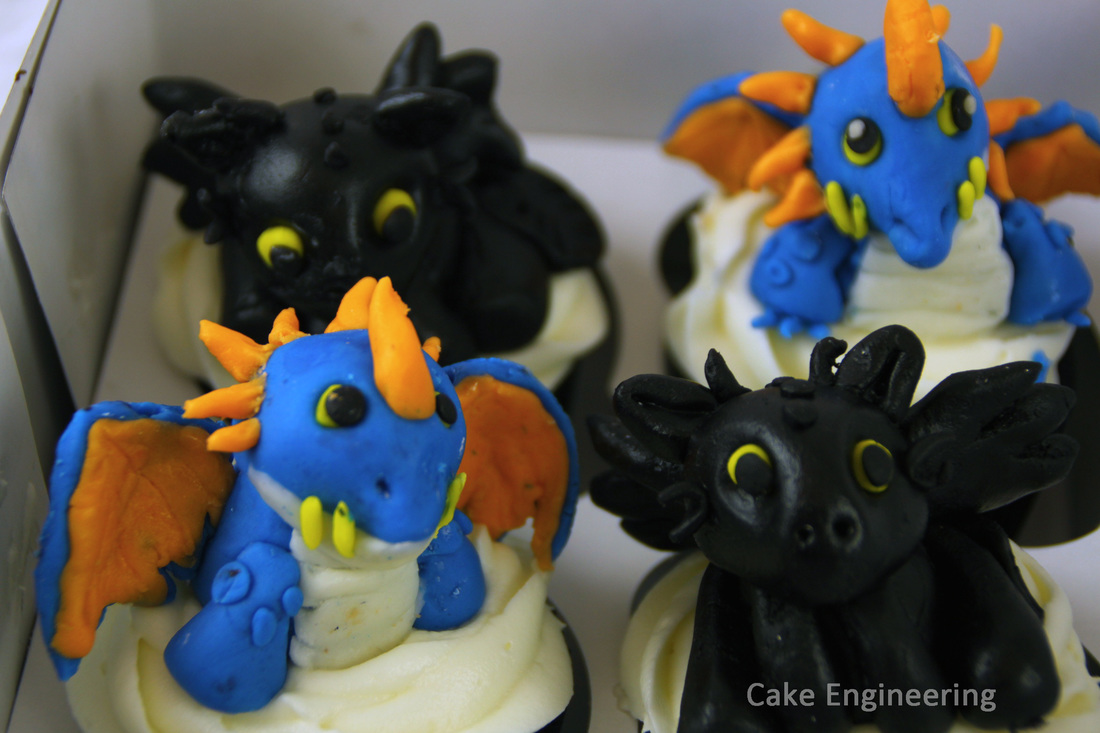
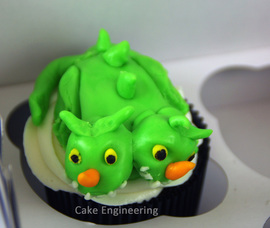
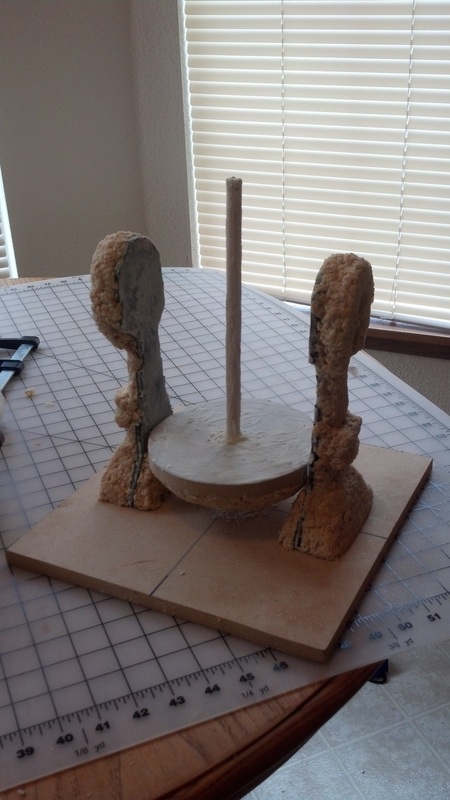
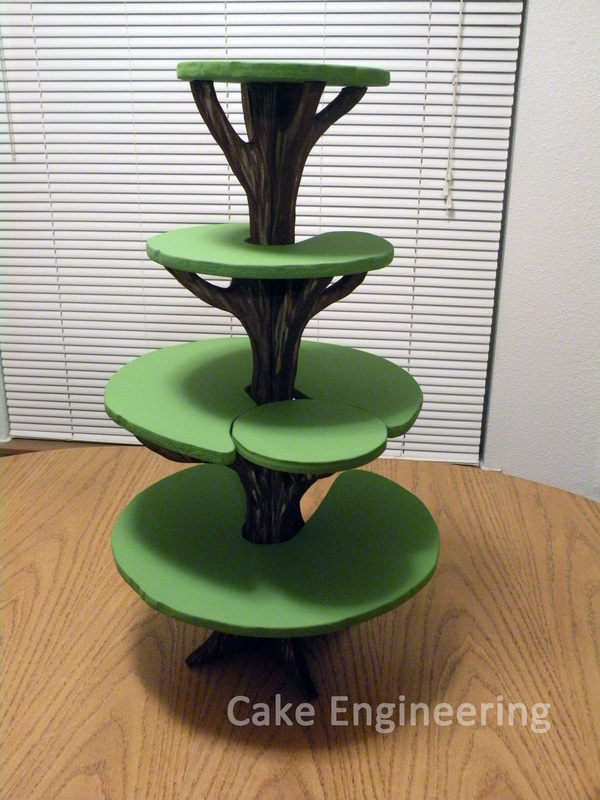
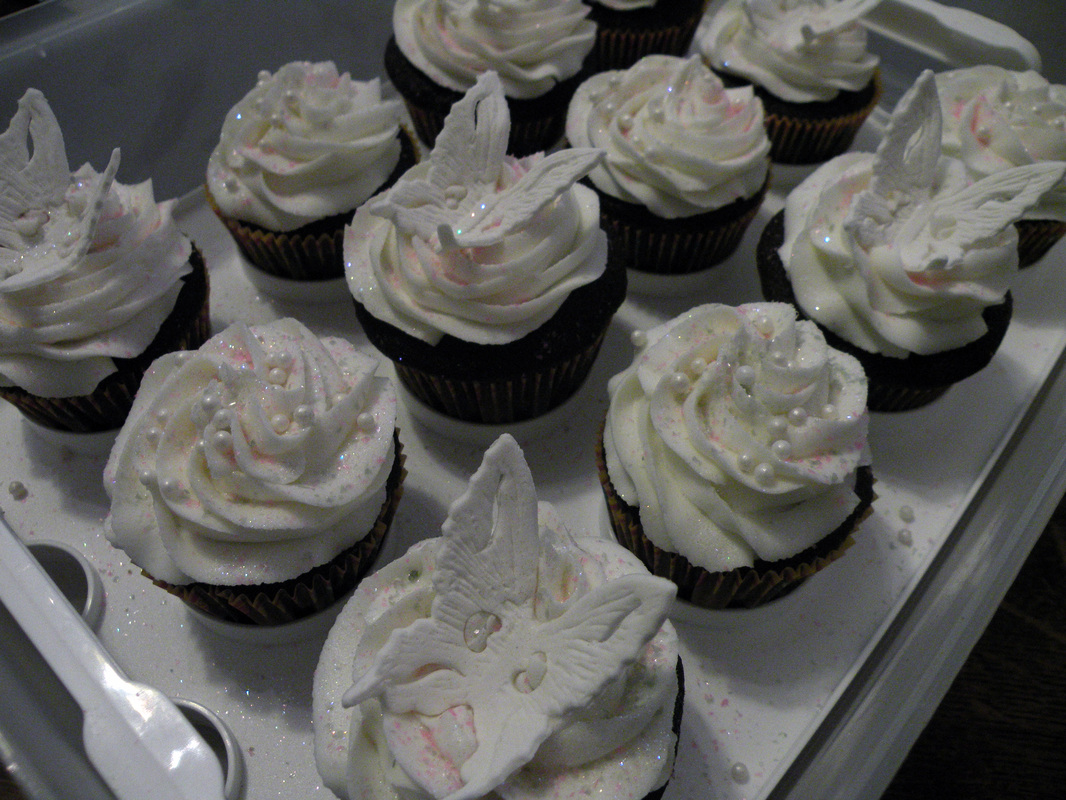
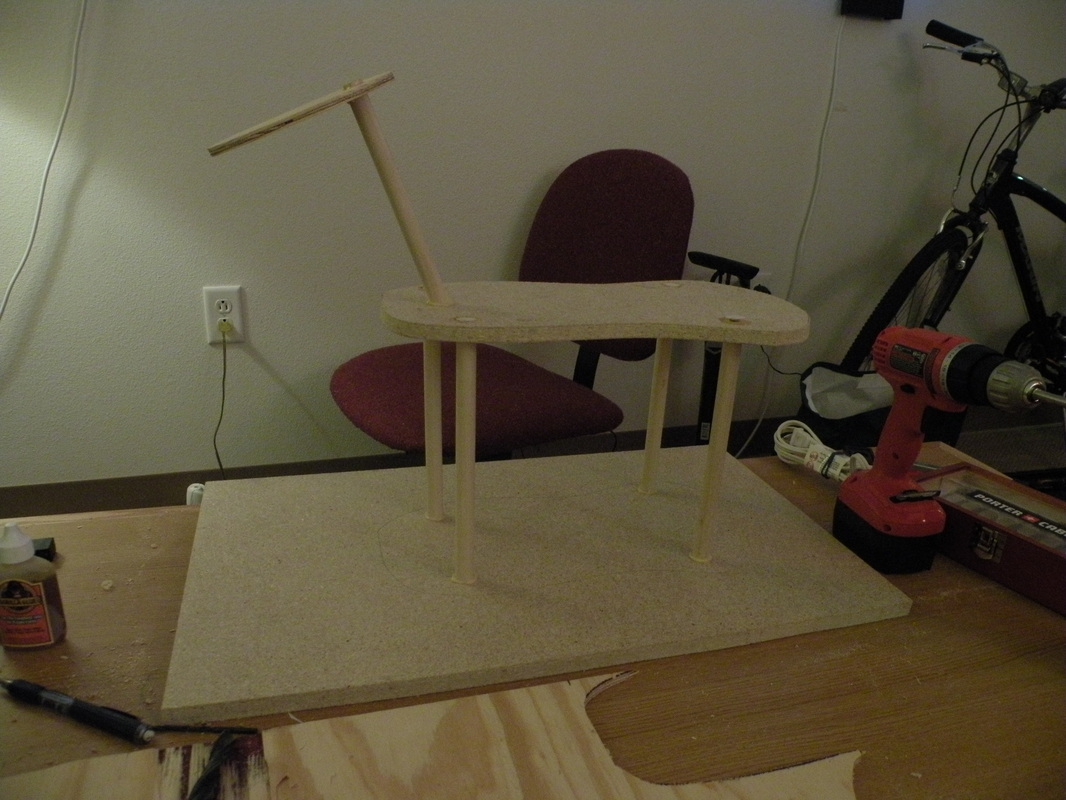
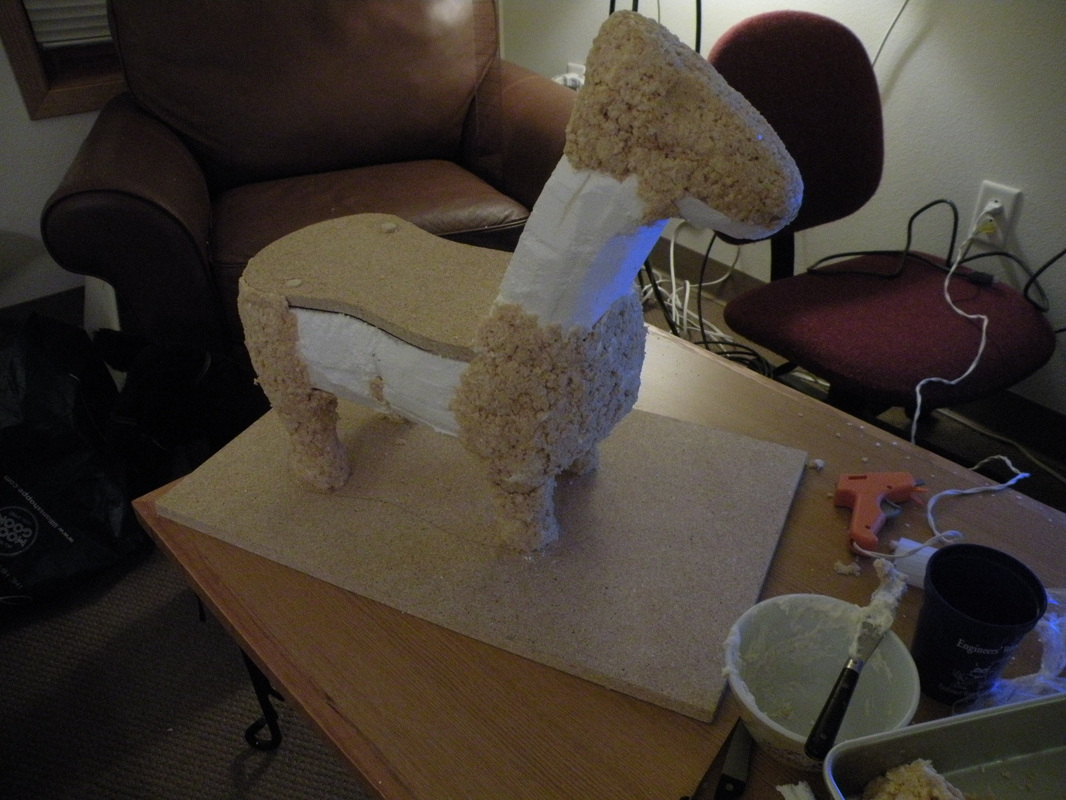
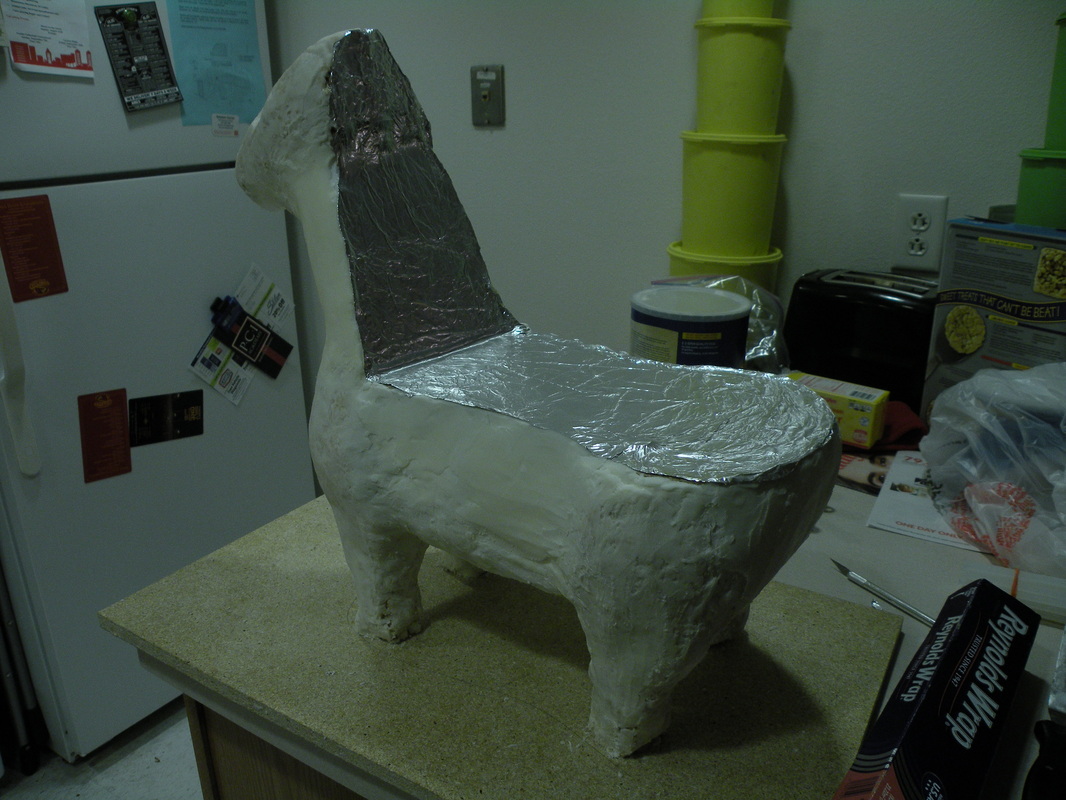
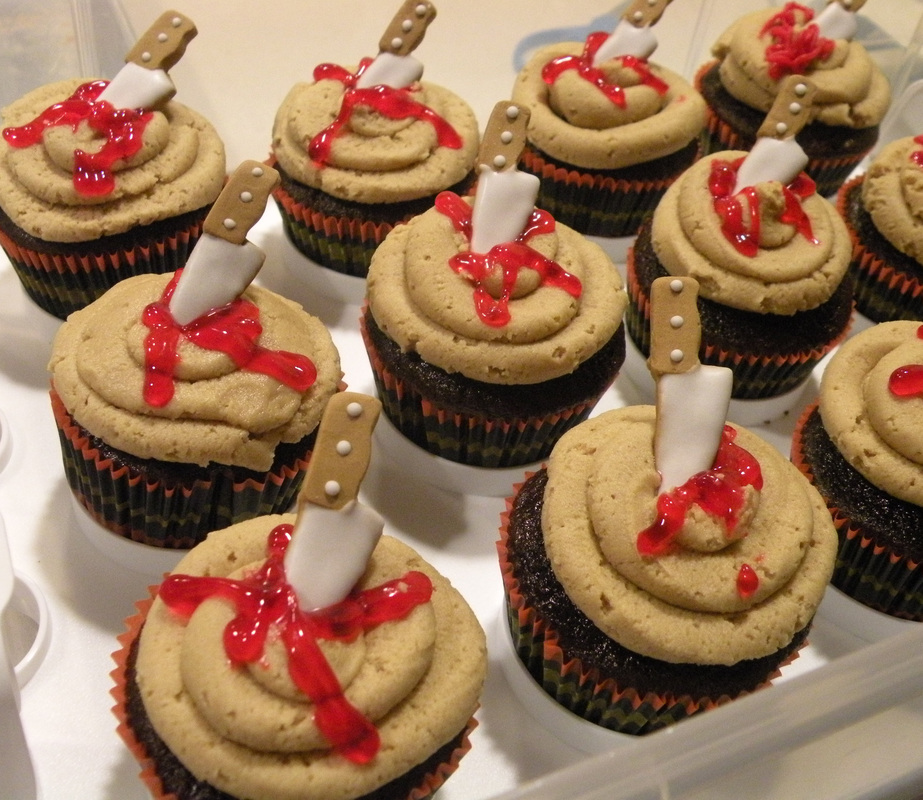
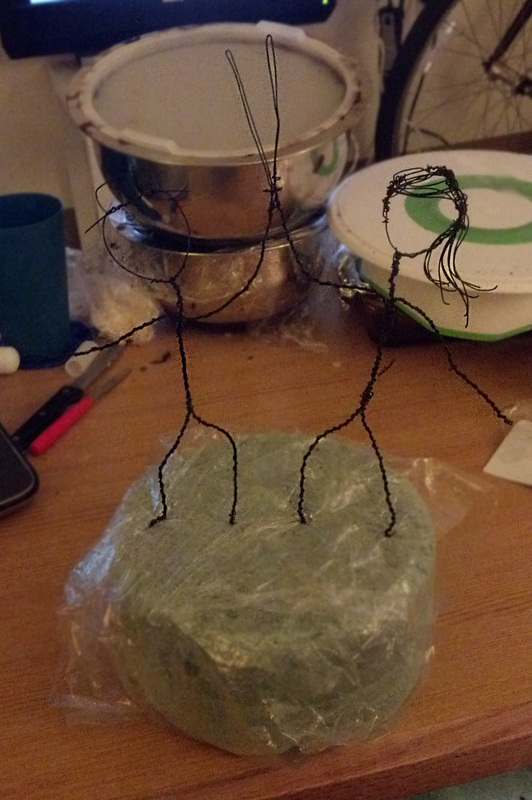
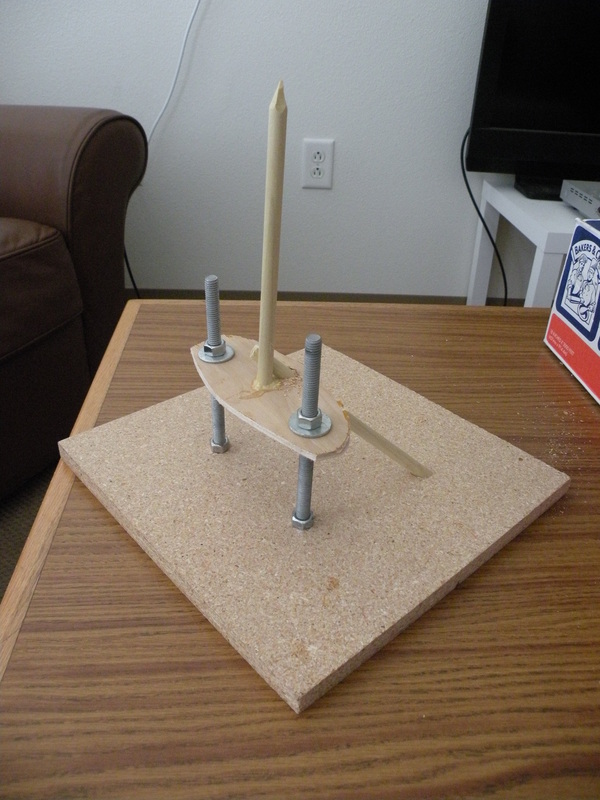
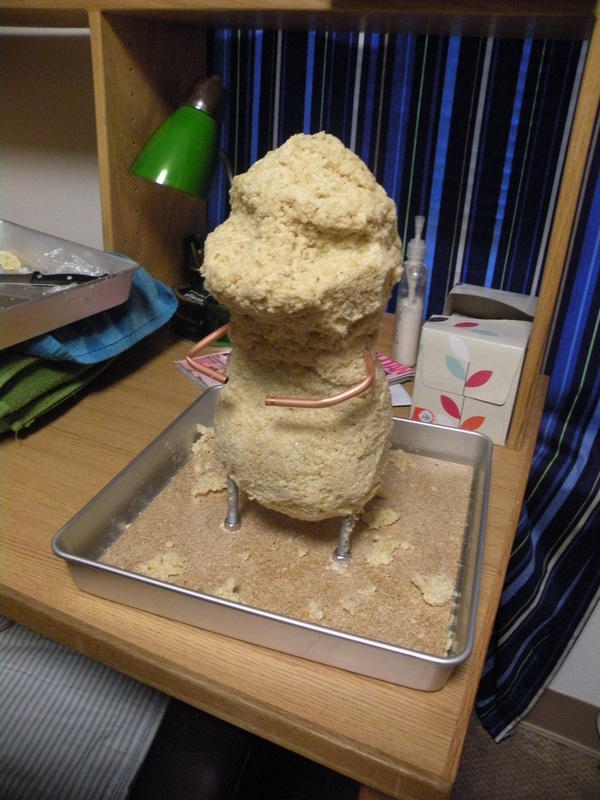
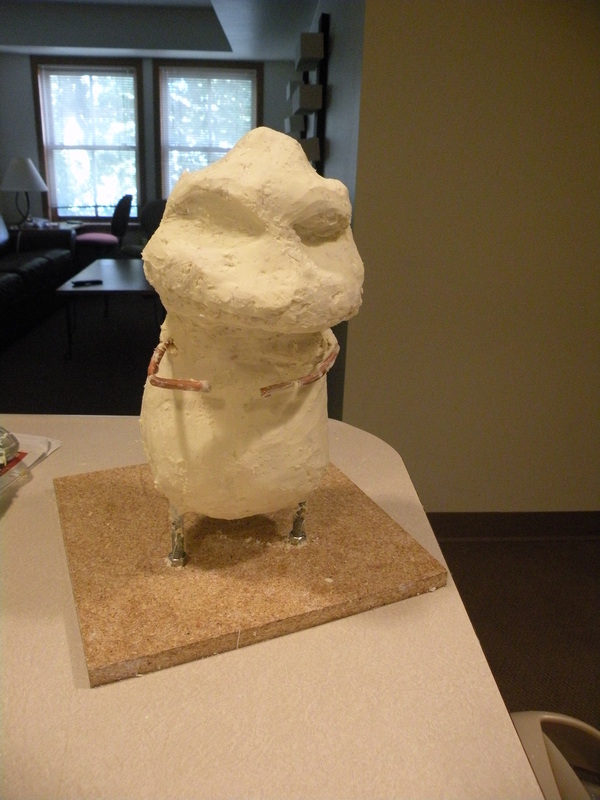
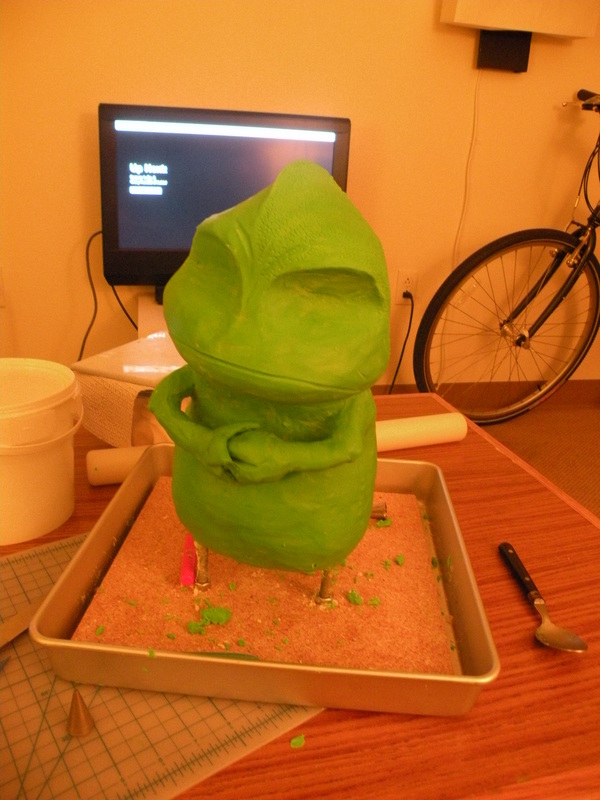
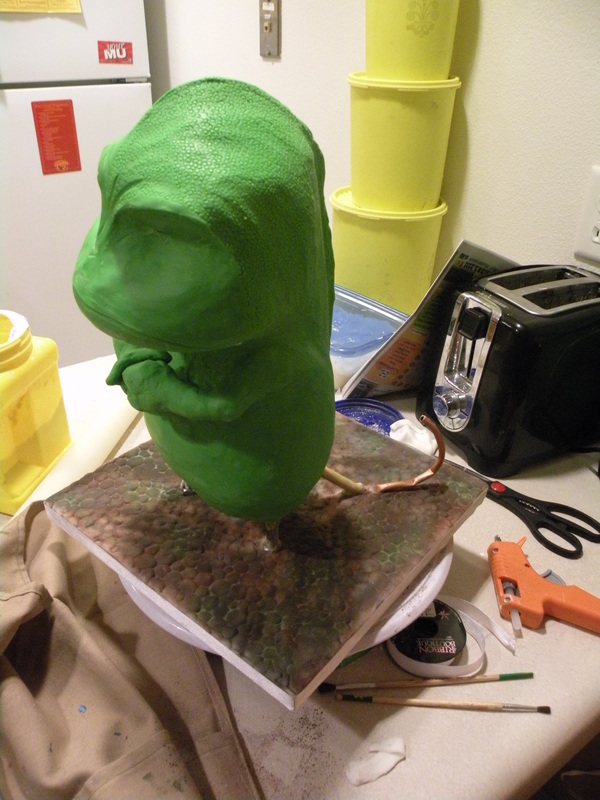
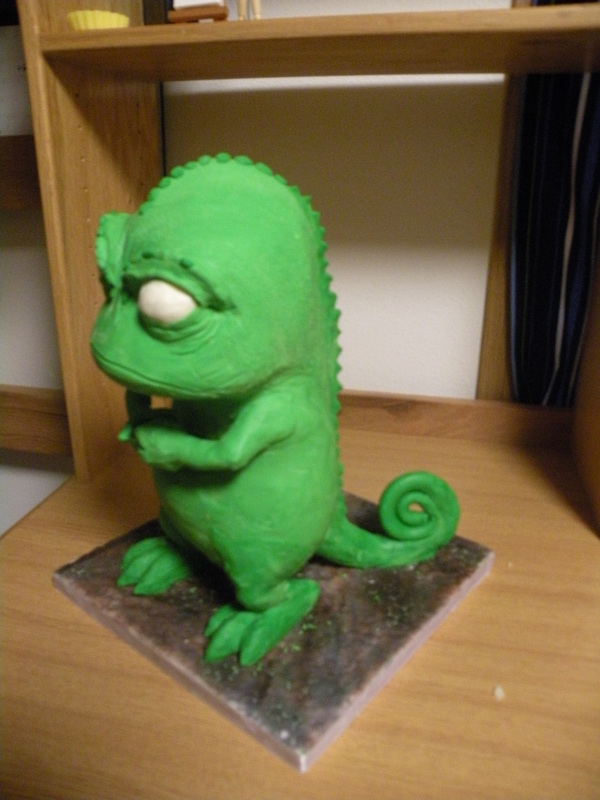
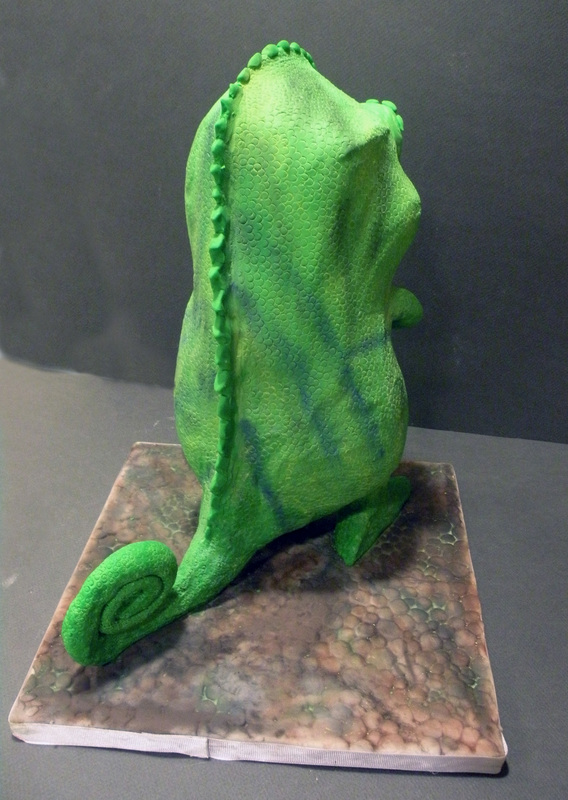
The final cake from 2015 is based off the 2010 movie "How to Train Your Dragon". The cake contains one of the main dragons from the movie, Toothless. The Toothless character has an internal structure made of foil and wire that was then covered in fondant. The cake part was covered in a marbled fondant with fondant details. Accompanying the cake were cupcakes with other characters from the movie. I'm still working on my figure making skills, but these aren't half bad. Well that catches me up to 2015. Tune into the next blog post to see what I have been up to in 2016!
Thanks, Mary Burroughs
0 Comments
Hi everyone, So I've let my little blog fall to the wayside the last few years. My day job has kept me pretty busy moving around the country, My last post I was in Washington State, but I have since moved to Nashville, TN. I've been able to work on a few cakes during my travels and I hope to work on more now that I've settled down for a while. Since my last post was from 2014, I'll finish up the rest of the cakes I made in 2014. First up are my Threadcakes Entries from 2014. The first cake was a finalist in the 2D category. This design is based off the Eat Hardy Threadless t-shirt design. It was really fun making all of the little breakfast items for the cake. The "syrup" is colored piping gel. It took me around 12 hours to make this cake. Here is a link to my entry: http://www.threadcakes.com/entries/view/1733 The next Threadcakes entry I did was based off the "Catcakes" Threadless t-shirt design. I picked this design because I love cats and cupcakes. I had fun making this cake, but I probably could have focused more on the cat to make it more realistic. Overall this cake took me around 17 hours to make. Here is a link to my Threadcakes entry: http://www.threadcakes.com/entries/view/1741 My last Threadcakes entry was based off the Threadless t-shirt design "Beauty Immortal". While the cake tasted great, I think I needed to take more time to focus on each of the elements of the cake. I rushed through this cake. If given more time, this would have been a lot better. I did spend 20 hours on the cake, but I should have spent double that amount for a better outcome. Here is a link to my Threadcakes entry: http://www.threadcakes.com/entries/view/1787 Well that should bring me up to date for 2014. Tune in to the next blog post for my 2015 cakes.
Thanks, Mary Burroughs Well it looks like I haven't posted in quite a while. This last year has been super crazy with work and travel that I haven't had much time to catch my breath. My last post left off with my new job in Washington State. Well since then I have now moved to Nashville, Tennessee for my permanent placement and hopefully last big move for a while. I enjoyed exploring the beautiful scenery in Washington State, but was not a big fan of all the rain and gray skys in the fall and winter, so hopefully Nashville weather will be a bit nicer. With all my moving around and travel for training and classes, I haven't had too much time for cakes. Since my last post, I only made 5 cakes, 1 custom cupcake stand and 2 cupcake orders. The first cake was created for a co-worker's baby shower. Her nursery theme was hot air balloons and I wanted to make a cake based off of that. The balloon part and basket are both made out of chocolate cake. I used toothpicks for the strings and painted them with edible paint. I also hand-painted each of the colors onto the balloon with edible paint. The next cake I created was also for a co-worker. Her grandson was a big fan of Jake the Pirate, so the cake was themed after that. The pirate map is a thinly rolled piece of fondant that I tattered the edges of to make it look weathered. This next cake was a fun cake to do. I recreated R2-D2 from Star Wars. I created a wooden internal structure to elevate the main body of the cake. I also used rice krispy treats (rkt) for the legs and coated them in modeling chocolate and fondant. I used rkt because it would be able to hold its shape better than cake. I also added some LED lights as an extra touch. I covered the bottom of the lights in plastic wrap so they would not come in contact with the cake. This next cake was very special to me. My boyfriend is a huge fan of all things Legend of Zelda, so I decided to make him a Legend of Zelda - Hylian Shield. He actually wanted to help with the cake, so I taught him how to make the cake batter. The actual cake part was all him, but the decorating part I did. This next cake I created not only the cupcakes, but also the stand that went with them. The cupcakes were made for a baby shower and the theme was woodland creatures. I immediately thought of incorporating a tree into the cupcakes somehow. I decided to create a cupcake tree stand. I used 1/2" MDF board and cut out a tree trunk shape. I also had to size the platforms to fit all the cupcakes onto the stand. Once I got everything cut out and sanded, I painted the stand to look like a tree. For the cupcakes I created a variety of forest animals and plants out of fondant. I also made cupcake wrappers using a circle punch. Overall this was a really fun design. This next cake was a bit tricky to coordinate. I made all the decorations and baked the cake in Washington State and decorated it in Washington DC. This was my first experience flying with a cake. I didn't have any issues with airport security questioning the cake and I was able to fit the cake box under the seat in front of me. Cake does get a bit heavy carrying it around though. The only issue I had while decorating this cake was time coordination between myself and the location where I was going to decorate the cake. My last cake I made was cupcakes for my niece's graduation party. This was also a traveling cake. I made most of the hat and scroll decorations in Nashville and baked and assembled the cupcakes back home in Iowa. I did find a new cupcake liner that is amazing. I used grease-proof cupcake liners and after baking, you could still see the pretty design on the outside whereas normally the design is hard to see after baking. I will definitely use these cupcake liners in the future. Well that is all the cakes and cupcakes I have made this past year. Hopefully once I settle into Nashville I will start making more cake creations.
~Mary Since my last post I have successfully moved to Washington state. The pace of life is a little faster over here and there is a lot more congestion than Iowa. I do like the scenery change from cornfields and cows to pine trees and mountains. I haven't done too much traveling in Washington, but I look forward to all the future explorations to come. My new job is going well and I am learning a lot. So far I have had the opportunity to travel to Seattle to see the new tunneling project, see the floating bridges up close and even travel all the way to the eastern part of the state to Spokane, WA. The next two years of my training will go by way too fast, but I look forward to what I will learn and where I will end up. As far as my cake business goes, I will continue to take orders as they come in. So far since I have moved here, I have made 6 cakes and 2 cupcake orders. My co-workers are keeping me busy with cakes! Prior to moving to Washington, I made graduation cupcakes for my ISU graduation party. On May 11, 2013 I officially graduated from Iowa State University with a B.S. in Civil Engineering. While it may have taken me 6 years to get my degree, it was worth it. The following pictures are my cupcakes from the party. The flavors were red velvet with cream cheese frosting and chocolate with buttercream. The graduation caps were a mini Reese's cup topped with a Ghirardelli chocolate square and an orange tassel (engineering tassels are orange). My sister decided to host her baby shower the same day as my graduation party, so I made the cupcakes for her as well. It was a busy day of cupcake making. The first cake I made since arriving in Washington was for a co-worker moving to Chicago, IL. My co-worker, Yamilee, is a big fashionista, so I themed the cake after a Louis Vuitton pattern for fashion and made it look like a suitcase. I added "stickers" to the cake to make it look like a traveler's suitcase. The cake flavors were red velvet and carrot cake. The next cake I made was for my co-worker's granddaughter, Sophia. The cake is themed after the Disney show Sofia The First's logo. I modified the logo to change the name to Sophia instead of Sofia and added a 3 into the crown for her age. Some noted features of the cake are the hand-quilted texture on the purple background of the logo and the hand-placed pearls throughout the cake. The cake was chocolate with pink buttercream frosting. I added sparkles to make the cake pop. The next cake is a female version of a previous cake I made. I had previously made a Mickey Mouse cake with a present and this time I made a Minnie mouse version. My co-worker's daughter loves her Minnie Mouse toy, so I decided to replicate that toy in cake. This cake included a little bit of structure for the head so it didn't come off during transportation. The cake was white cake with raspberry filling. My co-worker's 2 year old loved the cake. The next cake was made for the 2013 Threadcakes contest. I chose a design that looked like the game Bioshock. It took me 30 hours over 5 days to make the cake. To view my entry on Threadcakes click this link. The next cake was made for my co-worker's father's 92nd birthday. Every year my co-worker would always buy a store-bought cake and would write the Chinese longevity symbol on it. This year I got to make the cake! My co-worker gave me a few designs to choose from, and I chose this one. I liked this design because of the detailing. I used my handy dandy x acto knife to cut out the Chinese symbol. The 'lotus' flowers were made using a tear-drop shaped cutter and a veiner. The cake flavor was yellow cake with buttercream frosting. The next cake and cupcakes were made for yet another co-worker. This time was for my co-worker's niece's birthday. Her nickname is bug, so the cake and cupcakes had a ladybug theme. I made a 6 inch cake and 24 cupcake. The cake was half chocolate and half vanilla with green buttercream frosting. I made fondant daisies, ladybugs and leaves to decorate the cake and cupcakes. The last cake I made were zombie cupcakes for my co-worker's nephew. I made chocolate cakes with chocolate frosting. For the decoration, I crumbled chocolate cake crumbs to look like dirt, made fondant tombstones and a fondant hand. I definitely got my practice in hand-molding each hand... Well looks like I'm all caught up on my latest cakes....whew! I don't have too many cakes lined up in the next few months, so I might take some time and enjoy the Washington scenery....
So it looks like I haven't written anything in a while. The past few months have been entirely consumed by school and work with little time to make any cakes. It was a pretty hectic last semester of school, but I finally made it and I can now say I am an official engineer! (I graduated on May 11th with my bachelors in Civil Engineering from Iowa State University!) So there are a few changes in my future, one of them being the indefinite postponement of cake making in Iowa. I will no longer be residing in Iowa as I have taken an engineering position in Washington state. It is unclear if I will be able to continue Cake Engineering in Washington State due to zoning/state laws and time. I will still try my best to continue improving my cake making skills for when I have the opportunity to revive Cake Engineering. It has been an awesome adventure making all the cakes the last few years, and I hope to continue in the near future. Since my last post, I have made 6 cakes. The first cake was baby shower cake for my friend's baby shower. The small cake on top is 6 inches and made out of red velvet cake. The owl was made using rice krispies covered in fondant. This also was my first time making champagne frosting, which is quite tasty. Each of the cupcakes was topped with a fondant button. The next cake was made for my mom's birthday. She used to love sewing, so I made her a cake to look like a spool of thread. The top portion of the spool was a piece of cardboard covered in fondant. I could have made an edible topper, but I ran out of time. The next cake I made for Easter. My grandmother loves chickens, so when I stumbled across this cute chick cake idea, I had to make it for her. This next cake was made for the winner of a cake I donated to a raffle for a fellow Civil Engineering student diagnosed with terminal cancer. The logo is hand-cut from fondant and carefully placed onto the covered cake base using a stencil. The last cake I made is a husky holding a fish in its mouth. The fish was made using Mexican Paste so it could dry hard and fast. Well that is all the cakes I have made since January. I have enjoyed being able to share my talents with so many people over the last few years and I hope to someday share my gift again. Right now I am going to focus on my engineering career, but don't count me out just yet. I have a few extreme cake ideas up my sleeves that just may make an appearance sometime soon. So until until ne
I haven't posted in a while, so this post will be about what has been going on since November. I've been busy with my internship with the FHWA the past few months as well as cakes. I have made 5 cakes since November. The first cake is the first of two cow cakes I made during November. I wasn't entirely happy with how the face came out for this cake, but it was good practice for the other cow cake later in the month. The next cake I made was cupcakes for my sister for her birthday. I made the butterflies on top out of mexican paste using a butterfly mold. To get the bent shape, I placed the butterflies in an egg carton to dry. I sprinkled the top of the cupcakes with glitter. The next cake I made was a 3-D free standing cow cake for a wedding. The couple didn't want a traditional wedding cake. I made the stand using particle board and wooden dowels. I used foam on the bottom of the stand, front of the neck, and bottom of the head. I had problems in the past by placing rice krispies on the bottom of free-standing cakes, so I decided foam would not face the same problems with gravity. I covered the stand in foil to prevent foam from touching cake. I finished off the cake with fondant and air brushing. I placed the modeling chocolate grass on location. I also made a banner sheet cake to go along with the cake. The next two cakes I made for my twin nieces. I used a real tiara for the pillow cake and Littlest Pet Shop toys for the other cake. Well that's all the cakes I have made in the months of November and December. I have a few cakes coming up in the next few months including a legend of zelda cake with lit sword. In 4 months I should also be graduating with my Bachelors degree in Civil Engineering. Well that's all for now.
~Mary The month of October seemed to fly by really fast. I was constantly busy with my internship with the FHWA-Iowa Division, online class, traveling back home, and cake orders. I also celebrated my 24th birthday this month, but didn't have time to make a fancy cake, so I settled for delicious cupcakes instead. I'm hoping the next few months won't be as busy so I can catch my breath and prepare for my last semester at Iowa State University. So the first cake I made in the month of October was a TARDIS cake from the TV show Doctor Who. The TARDIS is a time machine and spacecraft that can transport its occupants to any point in time and any place in the universe. This cake was made for a big fan of Doctor Who for their birthday. I decided to make the cake extra special by placing a working LED light on top of the cake since the TARDIS in the show has a light on top that glows. The cake is German Chocolate with Chocolate Ganache. When I first started making the cake, I stacked all the square layers of cake on top of each other with the ganache in between each layer. I noticed the cake started leaning to the side, so I decided to stick a wooden dowel in the middle of the cake tower. This really didn't help with the leaning. I didn't want the cake to topple over when I was transporting it, so I decided to cut a wood base and glue a PVC pipe in the middle for stronger support. I then threaded the cake through the PVC pipe and the leaning went away. Once I had the cake in place, I squared up the edges of the cake, frosted the outside, and placed the fondant detail. To make the cake look more authentic, I used edible black paint to add shading and dimension. I finished off the cake by placing a battery operated LED light on top. The next three orders for the month of October were for cupcakes. The first cupcake order was for my co-worker's 40th birthday, which happened to be one day away from my birthday. His favorite food is bananas, so naturally I made banana cupcakes. For the frosting I made a lemon buttercream and topped the cupcakes with a banana chip. The next cupcake order was for my birthday cupcakes. I love Reese's Peanut Butter Cups, so I decided to replicate the flavor combination in cupcake form. I used my chocolate cake recipe for the cupcake. I then filled the cupcake with chocolate ganache, topped it with my peanut butter frosting, and placed a Reese's Peanut Butter cup on top. I finished the cupcake off with a drizzle of chocolate ganache. The cupcakes tasted exactly like Reese's Peanut Butter cups and were delicious. The last cupcake order was for a Halloween party I helped host. I cheated and bought pre-made Wilton royal icing knives I saw in the store (which tasted horrible). I used red piping gel for the "blood" and made my peanut butter frosting to top off the cupcake. If I were to make these cupcakes again, I would probably make the knives myself out of my tasty fondant so at least you could eat the topper without breaking your teeth. The last cake for the month of October was for the son of my Physical Therapist. I had made red velvet cupcakes around Valentines Day for my Physical Therapist as a thank you to help get me back in shape after my back surgery, which he then brought home to his family. His son really loved my cupcakes and wanted my red velvet cake for his birthday this month. I made a simple 1/4 sheet cake covered with my cream cheese frosting and decorated the cake with fondant cutouts of a few of his favorite things. Well that's all the cakes and cupcakes I made for the month of October. Coming up next month I have two cow cake orders and a few other cakes, so stay tuned.
~Mary So the last two months have been pretty busy with my internship with the FHWA-Iowa Division. I've had the opportunity to travel all over Iowa and even to Illinois. I am really liking my internship so far. Cake wise, I have seen a lot more interest in my cakes since having an article written about me on the ISU homepage, but not a lot of cake orders have resulted. The past two months I have made only 3 cakes. The first cake was a 3-D Dog made as a surprise grooms cake and was made to look like the groom's dog. I was able to utilize edible markers to replicate the dog's collar. The cake part is sitting on a wooden platform to make the bottom of the dog elevated from the ground. I used modeling chocolate and rice krispies to help form the curves of the dog. I added fondant, petal dust, and green frosting grass to finish off the cake. Overall this cake was really fun and challenging to make, but so worth it. The second cake was for a wedding for a friend of mine. She and her fiance are avid readers of the web comic XKCD, so they wanted a cake similar to the comic. I came up with the idea of creating stick figure representations of the couple acting out scenes from their relationship XKCD style. To achieve this on the cake, I first covered the cake in fondant and put on the bottom ribbon. I then, after much practice on paper, used an edible marker and hand-drew the images onto the side of the cake. For the topper, I twisted black 20 gauge wire into two figures fencing (they love to fence). I'm really please with how it turned out. An interesting fact about the first two cakes is that they were both for the same day. The deliveries were over 200 miles apart as well. Luckly I was able to deliver one cake in the morning, and the other one in the afternoon. Ah the joys of being the baker, artist, clean up person, and delivery person..... This last cake was made for a very special someone...my dad. This year was his 48th birthday and the only point in his an my life where I would be exactly half his age. My dad likes bobcat skid loaders and uses them at work and at home, so I decided to make a cake to look like one. My dad requested his favorite combo of chocolate cake with buttercream frosting for the flavors. I utilized my edible markers (handy little things...) for the cage, presents, and numbers/words on the cake. The numbers on the side of the cake are my dad's age plus the letter B. I decided to go with forks on the cake instead of a bucket because I thought it would be neat to have the skid loader hauling presents. When it came time to cut the cake, I put candles where the exhaust went, and my dad got a kick out of that. All in all my dad enjoyed the cake and it was quite tasty....Happy Birthday Dad! Well that's all the cakes I have for now. Coming up I have orders in for a Tardis cake with LED light, and a Cow/Steer cake. Thanks for reading!
~Mary Burroughs So I made two cakes for the Iowa State Fair this year, a chameleon cake (Pascal from Tangled), and and castle dragon cake. My chameleon cake placed second and my castle dragon cake didn't place at all. The first cake is my Pascal cake. I was going to make this cake for a friend's birthday a year ago, but the order was canceled. I liked the design idea too much, so I made it for the Iowa State Fair this year. To make the cake stable, I created an internal support system for the rice krispies to sit on. The next step in making this cake was to fill the stand with rice krispies. I used rice krispies because this cake was made for display purposes only and I didn't want to use styrofoam because it isn't very forgiving if you cut too much off. Once I had the shape I desired, I covered the rice krispies in white chocolate to create a smooth surface for the modeling chocolate that was going on next. I then covered the cake in green modeling chocolate. I used a round frosting tip to add the scale texture to the modeling chocolate. Next I added the base cover and tail wire to the cake. I then added the eyes, legs, and more details to the cake. I finished off the cake by adding the iris to the eye and finishing details. The second cake I made for the Iowa state fair was a castle dragon cake. I began construction of the cake with sheets of rice krispies cut into a simple castle shape. I added some more rice krispies to the base to made the cake look like a castle. I next covered the cake in chocolate to create a smooth surface. I added fondant bricks one at a time to the cake. This took around 12 hours to place all of the bricks. I then layered the coloring onto the bricks using my air brush. I finished off the cake by adding a dragon and water. To make the tail elevated, I used a copper wire. The dragon was made using modeling chocolate. I used a round piping tip to add the scale texture. I hand-molded the wings and added them after I had the dragon body completed. The water is blue buttercream frosting.
This past month was pretty busy with cakes and preparing my Iowa State Fair decorated cake entries. I had 3 new cakes and 2 Iowa State Fair cake entries. I will have another post about my Iowa State Fair entries soon. I also was featured on the Iowa State University website: www.iastate.edu The first cake is a birthday cake made for my co-worker's daughter's 1st birthday. I made a smash cake for the daughter to eat. The cake is just a simple number shaped cake decorated with butterflies, lady bugs, caterpillars, and flowers. This next cake is a DJ cake with working lights and a rotating spinner. The spinner was a bit tricky to figure out. My dad came up with a solution to get the disk to spin. My dad re-purposed the motor of a old humidifier for the spinning portion of the cake. I used a headband, rice krispies, and modeling chocolate for the headphones. For the laptop I used L-brackets, 2 rectangles of wood, rice krispies, and fondant. To get the straight line around the outside, I used painters tape and my airbrush. The overhead lights were also a bit tricky to figure out how to get them to stand up. I used carriage bolts, L-brackets, and a ripped 2x4 for the overhead support. I also created a platform for the laptop to sit on by cutting a hole in the base and screwing 2 boards through the holes and L-brackets and another piece of wood for the upper platform. I used LED lights throughout the cake to replicate lights on an actual DJ setup. The third cake I made was for my brother-in-law's birthday. He loves to fish for catfish, so I made a catfish cake. The cake was chocolate cake with buttercream filling. I used a round frosting tip to add the scale texture. For the coloring, I first placed painters tape on the sides to block off a strip of fondant. I then added spots and layered colors using my airbrush. I added the whiskers after the coloring. For the water I took a paintbrush and frosting and "painted" the board. The last two cakes I made for the Iowa State Fair. The first cake is Pascal, the chameleon from the movie Tangled. The second cake is a castle with a dragon. I will post more details on how these cakes were made in another post. Well that's all the cakes I made in the month of July. Look forward to next month where I will have an XKCD themed cake and a 3D dog cake.
~Mary Burroughs |
Author
Mary Burroughs Archives
September 2016
Categories |